Written by María Navarro
Index
Let’s Encrypt is a free certifying entity endorsed by large companies in the industry that allows us to obtain SSL certificates for our website through HTTPS without having to pay for it.
What is SSL?
SSL (Secure Sockets Layer) is a protocol by which users of a website are guaranteed that all data entered on the page or transactions that take place on it travel through the network encrypted.
A secure website is easily identified by the padlock icon next to the URL in the address bar of the browser.
What is Let’s Encrypt?
Let’s Encrypt is a Linux Foundation-powered certificate authority that offers free, automatic, open SSL certificates. Let’s Encrypt’s goal is to offer free, easy-to-use SSL certificates so that anyone can implement HTTPS on their website at no cost.
An SSL certificate, as it is in this case Let’s Encrypt, is a method by which the information that is sent from our website to a web server is encrypted. This information is what we normally enter in registers, forms or when we enter our credit card information to make a payment. If we have an SSL certificate activated, we will be encrypting that data and if someone were to intercept it, there would be no way to read it, since it would be encrypted.
Another issue to consider is that Google already takes into account those websites that have SSL certificates as positive points when it comes to positioning the domain.
Google has officially declared that it will benefit the positioning of those websites that have SSL certificates.
Some of the advantages of Let’s Encrypt Certificates
- 100% free and provide the same protection as paid certificates. Functionally they are identical and are recognized by major browsers such as Chrome, Firefox or Safari.
- It is very simple and quick to install.
- Certificates are automatically renewed every 3 months at no cost.
- It is not necessary to have a dedicated IP.
Why is it free?
Currently, an SSL certificate is currently priced annually from around 80€ to approximately 450€ depending on the type of certificate. Let’s Encrypt requires the support of generous sponsors and donors, so they are able to offer the service for free worldwide. Some of these big companies are, Facebook, Google, Cisco, Mozilla…
How many domains is the certificate valid for?
The certificate is valid for a single domain. If you have two domains pointing to the same hosting, you can use an SSL certificate for each of them. Let’s Encrypt does not currently support IDN domains, i.e. domains that include characters such as ñ or ç.
Activate Let’s Encrypt
The first thing we must do to activate the certificate is to go to our hosting company and activate it in the control panel. The ease or complexity of activating the certificate in the control panel will depend a lot on the provider we have contracted. As an example of some of them I add the steps to follow for SiteGround, CDmon and Webempresa.
For SiteGround:
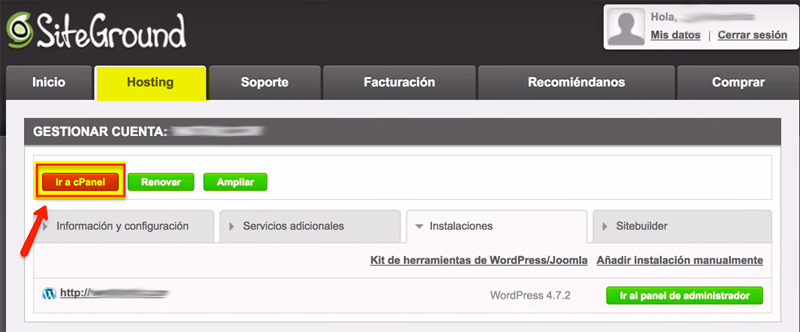
- We access the SiteGround management panel.
- In the “Hosting” tab click on “Go to cPanel”.
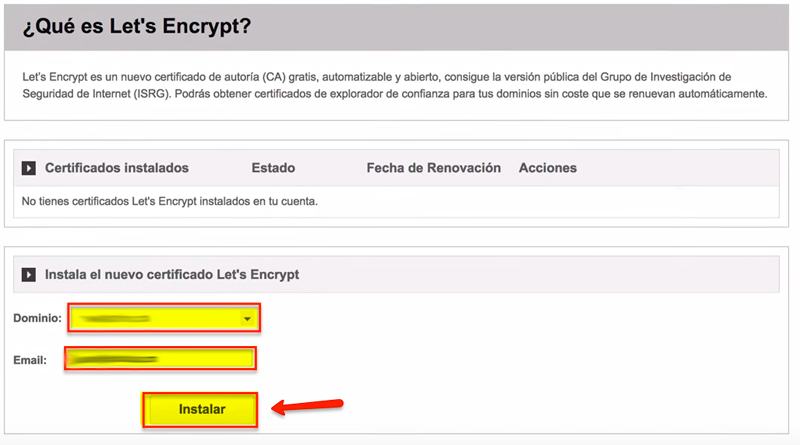
- Look for the “Security” section and click on “Let’s Encrypt”.
- Once inside we will add the domain where we want to install the certificate and click “Install”.
- Once installed, you will receive an email notifying you that the SSL has been successfully activated.
For CDmon:
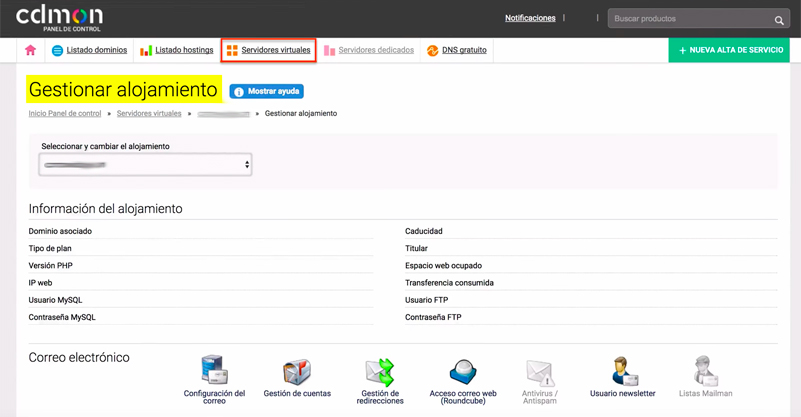
- We access the CDmon management panel.
- We access to manage accommodation.
- Go down to “Security” and click on the “SSL Certificates” icon.
- It directly gives the option to install Let’s Encrypt: SSL for free.
- Click on the “Disabled” button and a pop-up window will appear giving the option to “Enable”.
- An email will arrive notifying that the SSL has been successfully activated.
For Webempresa:
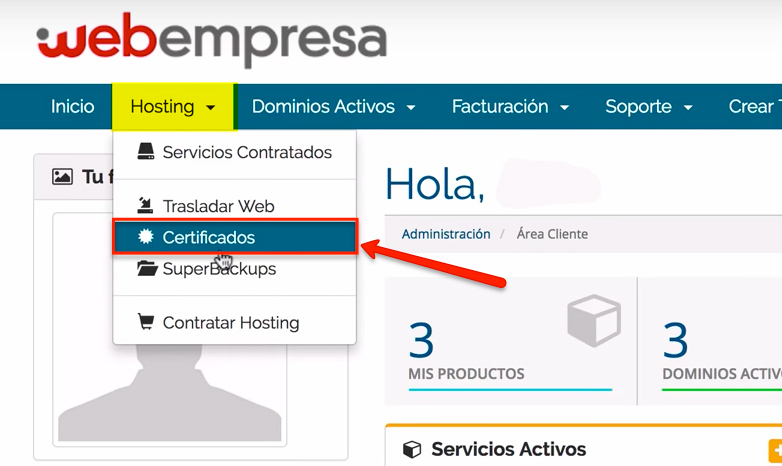
- We access the Webempresa management panel.
- Click on the “Hosting” menu and in the drop-down menu click on “Certificates”.
- A list with the domains we have will appear and next to each one a button “Manage Certificates”. Click on “Manage certificates” of the domain you are interested in.
- Once inside, two options will appear: Let’s Encrypt free and Comodo paid. Click “Install” Let’s Encrypt.
Once the free SSL certificate has been activated on the website, we must adjust our website and take into account two very important points:
- Modify all internal site links within our website that may lead to the old, unsecured version.
- Avoid maintaining the two versions HTTP and HTTPS since we would have duplicate content (two different URLs with the same content) and this should be avoided at all costs, since duplicate content is detrimental to positioning.
- Access the FTP server.
- We edit the .htaccess file.
- We add the following rule.
# Rule always pass everything to SSL
RewriteEngine On
RewriteCond %{HTTPS} off
RewriteRule ^(.*)$ https://%{HTTP_HOST}%{REQUEST_URI} [L,R=301]
- Register both in Google Search Console the new property https://midominio and modify in Google Analytics administration and change the property address to HTTPS.
Check if the certificate is working properly.
To check if your Let’s Encrypt SSL certificate is valid and secure you can check it on some websites by simply entering the domain of your website.


